How To Hang Outdoor Wall Art Correctly
Share
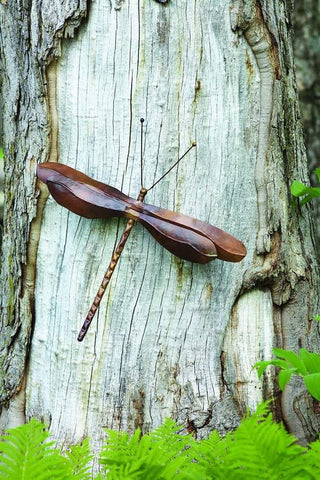
These days, it's common to have your garden space serve as an extension of your indoor living space. Your outdoor area—whether it be a deck, patio, or balcony—doubles as an entertaining space. Whatever your space may be, you can always elevate it with traditional (or unusual!) outdoor decor. There are several different ways to get creative, including hanging outdoor wall art.
Similar to how you would add art pieces to your indoor living room, outdoor wall art serves as an excellent way to spice up some of your otherwise lackluster cement, stucco, or brick walls. But finding the perfect outdoor wall art is just the first step. Next, you'll have to figure out how to safely and securely hang it.
In this article, we'll take a look at how to hang your outdoor wall art correctly, ensuring you know how to display your art on any surface. We'll also dive into some creative ideas on how to make your own DIY wall art for anyone feeling inspired. For everyone else, we'll also touch on some great places to buy garden art of your own.
Guide to Hanging Outdoor Wall Art
So, you've picked out your outdoor wall decor and even know exactly where you want to place it. That's great, but now, how do you get it hung up? Don't worry; we are here to help.
While decorating your exterior wall can feel really challenging don't let that stop you from beautifying your space. True, hanging art on stucco or brick might be very different from placing art in your indoor space, but here are a few tips and tricks to help you get the job done right the first time.
General Guidelines
When you want to add outdoor wall art to a brick wall, getting it right the first time is critical. Especially because some surfaces, like brick, can be nearly impossible to patch.
What You'll Need
Before you get started, you'll want to make sure to gather all of the necessary tools and materials to get started on your project. To properly hang your outdoor art on a brick wall, you will need:
- Measuring tape
- Pencil
- Protective gear (goggles, earplugs, leather gloves, and N95 mask)
- Hammer drill (or standard drill)
- Masonry drill bit (same diameter or slightly smaller than the diameter of the nails you are using)
- Framing hammer (or standard hammer)
- Masonry nails
If you are not familiar, masonry nails are made precisely for projects like these. They are the cheaper alternative to concrete nails and less likely to bend or break under pressure, making them longer-lasting. Masonry nails have two things that help secure them in place: a squared-off cross-section and a taper from head to tip
Now that you have all your materials, follow these steps to avoid having to reposition your piece once you have it hung up.
Step 1: Measure Your Spot
Quite possibly, the most critical step of the process will be properly measuring out where your holes will need to be to hang your art. As a rule of thumb, you'll want your artwork to be 5 to 5.5 feet off the ground, at optimal viewing height.
Using your measuring tape, find the ideal location where your holes will need to be, ideally somewhere around that 5 to 5.5-foot level mark. Keep in mind that you'll want to mark in the masonry joints located between bricks.
Remember, regular nails can shatter your brick. Fortunately, with the help of those special masonry nails,, you won't have to worry about damaging the brickwork as you hang your wall art.
Once you have found the ideal location for your nails in the masonry joints, you'll want to mark it with your pencil.
Step 2: Protect Yourself
Before you get started with the drill work, you'll want to put on your protective gear. Crystalline silica is a part of brick and mortar dust that gets into the air during drilling. To avoid inhalation, which can be hazardous, using an N95 mask with a respirator can help keep you protected.
Other protective equipment such as goggles, leather gloves, and earplugs are relatively standard when it comes to handling power tools. Make sure you keep yourself protected through your outdoor wall decor project.
Step 3: Get Drilling
Prepare your drill by ensuring you have a masonry drill bit that is either the same diameter or slightly smaller diameter to the masonry nails you will be using. Use this drill to create a pilot hole for your masonry nails.
Step 4: Hammer Away
Ideally, a framing hammer is best for masonry nails because of its additional weight. You can also use a standard hammer. It just might take you a bit more elbow grease and time.
After your pilot holes have been created, place your masonry nails in and hammer them in about 1.25 inches deep. While hammering, you'll want to make sure you are holding your nails as straight as possible. Make sure the nails are secure by tugging on them once in place. When appropriately placed, masonry nails should not wiggle at all.
Step 5: Hang Your Art Up!
Lastly, once you have confirmed that your nails are securely in place, you can hang your wall art. Use whatever fixing method the art piece recommends, and sit back and enjoy!
Tired of your art? The nice thing about hanging wall art from masonry joints is that you can quickly fill the holes with masonry filler if you ever need to remove the nails.
How to Hang Outdoor Art Without Nails or Tools
If you don't have any power tools or don't feel comfortable making holes in your exterior walls, don't worry. There are still a few different options you have to hang up your art without nails or tools. Here is a quick guide, depending on what type of wall you plan to hang your outdoor wall decor on.
Brick
Brick clips are an alternative to drilling and hammering into the masonry joints of your brick wall. These clips are made of heavy-duty tempered spring steel, capable of holding up to 25 pounds per clip. Best of all, brick clips do not require any holes or tools whatsoever. Spring edges and upper teeth help to secure a snug fit without damaging your brickwork.
Vinyl Siding
If you have vinyl siding exterior walls, special vinyl siding hooks are the perfect non-invasive solution for your outdoor space. Opt for a heavy-duty stainless steel hook to ensure no rust or staining on your staining over time. Vinyl siding hooks are easy to install and relocate as needed: they roll into the seams of your siding without damage. Each hook can hold around 10 pounds, depending on the design.
Stucco
Stucco is another typical exterior wall finish that can be challenging to hang your outdoor art on. Thankfully, many of the handy indoor non-invasive art hanging tools are also available for outdoor art. 3M is a common household name that makes hooks and hanging options that do not damage paint or other interior surfaces.
There are two options for hanging outdoor art on stucco made by 3M: exterior command hooks and double-sided exterior tape. Both the hooks and tape can hold around 5 pounds, so while they are not the most sturdy option, they do provide a great way to hang some of your more lightweight art designs on more challenging surfaces.
Wood
Maybe you are looking to bring some life to your wooden fence. Wall art is another great option for this area of your garden. Stick to hanging lighter items on fencing not to compromise the stability of your fence. Use simple D-rings to attach to the back of your wall art and install a metal hook to your fence using a drill or hammer.
How to Make Your Own DIY Outdoor Wall Decor
If you are the crafty type or maybe looking to expand your horizons, there are tons of different ways to make your own inexpensive outdoor wall decor. After all, it's hard to beat the price point of a DIY project, especially when it comes to long-lasting outdoor decorations.
You can even opt to source material from other art pieces you are looking to get rid of around your home. It's hard to beat free!
Outdoor Canvas Wall Art
A quick and easy idea for outdoor decor is making a canvas piece of your own. One nice thing about making wall art from home is that you can be sure it matches your style. For this project, you can create a wood frame of your own or pick up a cheap wood frame from the thrift store.
Using a staple gun, secure the vinyl tablecloth to your frame, stretching it tightly. Since this canvas is such a lightweight option, you can easily use any of the hanging methods we've discussed in this article to hang your new art.
Outdoor Plant Wall Art
Another quick and easy way to dress up your outdoor area is with a plant wall art piece. To make this type of wall art, you will need a frame that has been coated to avoid mildew over time. Instead of covering this frame with a canvas, you will loop through nylon-coated stainless steel cables making a grid.
Once you've completed your frame, you can fill it with all different types of air plants. Talk about a simple and inexpensive way to add life to your walls!
Where to Buy Garden Art
Let's face it. Not all of us are cut out for DIY crafts. There's no shame in that. Thankfully, there are countless resources for finding the perfect garden art for your outdoor space. Here are a few ideas to help you get inspired.
Facebook Marketplace
When in doubt, give Facebook Marketplace a try. Even if you aren't sure what you’re shopping for, you might find a hidden treasure here you didn't know you needed. One man's trash is another man's treasure in Facebook Marketplace in a nutshell. Come here to find great deals on local goods, including decor for your garden. If you're really lucky, you can even find some great pieces listed here for free!
Local Antique Shops
If Facebook isn't for you, you can always try out the old-school version of the marketplace and hit up your local antique shops. Here you can find some truly unique treasures for your garden. And, much like with Facebook Marketplace, you can enjoy browsing, even if you aren't exactly sure what it is you're looking for.
Happy Gardens Store
For those on the market for handcrafted, high-quality outdoor wall art, the Happy Gardens Store is an excellent one-stop-shop! Here you will find little treasures made from local artists to match your outdoor space and add a crafty touch.
About Happy Gardens
Happy Gardens curates an online collection of unique, thoughtful garden decor and merchandise for your outdoor space. Whether you've been searching high and low for that perfect wall art piece, beautifully crafted birdhouse, or charming rain chain, Happy Gardens has what you're looking for. After all, each product you'll find on our site has been handcrafted with love for your happiness.
Our unique collections include a remarkable variety of top-rated, beloved products, including unique garden ornaments and statues, eye-catching spinners, artistic rain gauges, and more to decorate your outdoor rooms. You can also check out our new line of merchandise, offering fun and exciting gifts readily available throughout the year. Find the best coffee mugs, wine glasses, and tote bags for the garden enthusiasts in your life.
Do you want in on the latest and greatest about our products? Join our mailing list by simply entering your name & email address. Looking to add some fun (and tons of tips and tricks) to your newsfeed? For endless garden inspiration and your daily dose of greenery, follow us on Instagram and Facebook.
We're here for you! If you need help selecting the perfect wall art piece or designing the ideal layout for your outdoor decor, never hesitate to reach out to us via chat.
