


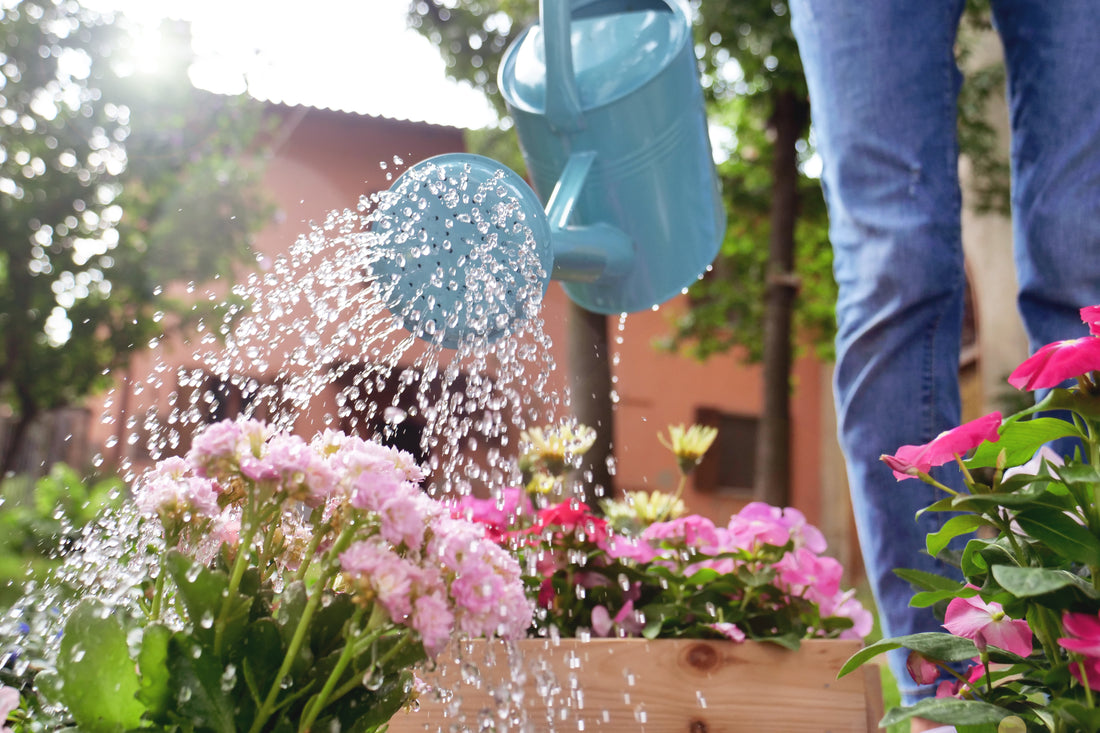
How To Make Your Own Watering Can For Your Garden
A watering can is a convenient gardening tool that helps make watering your plants more effortless than ever. The good news is, you can get away with spending very little or even no money at all on a watering can of your very own. Even better, you can easily craft one yourself using everyday items around the home.
So, before you go out shopping for a watering can for your garden, why not consider it a weekend project and get the whole family involved? Here are a few of our favorite creative watering can projects that can be done from home.
In this article, you'll learn how to make your own DIY watering can for your garden.
Make a Homemade Watering Can
There are tons of different options for making a DIY watering can of your own using materials you can find around the house.
Milk Jug Watering Can
There's nothing better than a DIY recycled watering can. After all, you're killing two birds with one stone. You're getting a helpful gardening tool, and you're doing your part to help save the environment. It's a win-win for everyone! It's also a cool idea to get your kids involved in projects that teach them to upcycle things that might otherwise become trash. In their eyes, you'll be one creative mommy.
What You'll Need
- Recycled, cleaned out milk gallon bottle
- Large needle
- Lighter
How to Make a Milk Jug DIY Watering Can
Use the lighter to heat the large needle. Make sure you have something to protect your fingers from the heat of the flame. A candle lighter with a handle is best for this project. Otherwise, a standard lighter will work too.
Once the needle has been heated by the flame from the lighter, you can easily poke holes through the lid of the plastic bottle pushing from the inside outward. Heat the needle each time you need to poke the top to make sure you can press through the plastic quickly.
It's that easy! You'll need to assist kids with poking the holes, but it's a fun way for them to watch as you make them their own watering can. You can even spray paint the bottle and allow them to decorate it however they like to be more involved.
Thumb-Controlled Watering Can
A slightly more advanced DIY watering can involve the use of a drill bit to make some holes. You can make a watering can that is thumb-controlled - an excellent idea for getting the kids involved in the watering process. The hope is that they'll see the fun behind the idea and want to be watering the garden all the time.
What You'll Need
- Any large plastic bottle or milk jug
- Drill with an approximately 3/16-inch bit
- Nail or thumbtack
How to Make a Thumb-Controlled DIY Watering Can
Make sure your container is thoroughly cleaned before starting the process. Then, you will need to use a drill to make holes in the lid of your container. The sizing isn't too important, but you'll need to make sure it's just one hole that you can completely cover with your thumb (or a little one's thumb if that's the idea).
Next, you will use a nail or thumbtack to make small holes in the bottom of your bottle. It should be easy enough if it is thin plastic, but you might need to use your drill once again if you choose a thicker bottle.
Fill a large bucket with water and dunk your DIY simple watering can in. Once submerged, lightly cover the hole on the lid with your thumb and pull the watering can out of the water. Carry your watering can to your plants and release your thumb to release the water. Bear in mind that if you've made a large watering can, the kids might need help carrying it around the garden.
Water Bottle Watering Can
Surely you're beginning to see a trend in that these great ideas don't involve the most complicated materials. You can easily create a DIY watering can while recycling household objects. This next watering can is another favorite that takes up minimal space and stays nice and light due to its size, making it perfect for kids.
What You'll Need
- Plastic water bottle
- Permanent marker or masking tape
- Nail or thumbtack
- Scissors or razor blade
RELATED: Watering Can Ornament
How to Make a Water Bottle DIY Watering Can
Finding smaller containers is easy enough. Consider using a standard drinking water bottle for this tutorial. Remember that an awesome benefit to keeping your container small is allowing kids to help out with the watering.
Using a permanent marker or masking tape, figure out where to place the holes on the side of the bottle. Just below where the bottle starts to curve, you should draw a square that should not be longer than your fingers. You'll then use a nail or thumbtack to punch holes as evenly as possible, putting approximately 25 holes in the area you decided to map out.
On the opposite side, cut out a square using scissors or a razor blade. The instructions for using this watering can are simple enough. Using the open hole, fill with water until about an inch underneath the opening. Carry it over to your plant, holding the bottle upright. Wait until you are over your plant and turn the bottle with the holes downward. This will act as the spout allowing watering to drip out.
See this cool Antique Blue Watering Can.
Mason Jar Watering Can
Another great option you can't go wrong with is a mason jar watering can. Some people prefer the look of a glass jar over recycled plastic bottles, but it's to each his own. Whatever materials you choose to make your watering can with, you'll be glad you did.
What You'll Need
- Mason jar
- Nail
- Hammer
How to Make a Mason Jar DIY Watering Can
Mason jars are multipurpose, and mostly everyone has them in their kitchen storage somewhere. Some people use them to hold cut flowers, but did you know that you can also use one as a watering can?
Using a nail and a hammer, carefully nail into the zinc lid of the mason jar. Stick to just a few holes, as nails can be pretty wide, and you don't want to make your plants too wet.
Once you're finished, just screw the lid on, and you're good to go. Easy as can be. Get ready for a simple way to water your garden any day of the week.
Soda Can Watering Can
We will point out that most DIY watering can options we've provided don't look like the traditional water can. This DIY watering can be made from a soda can and a few other household items that you might typically consider waste material. Rest assured, capture the image you have in your head.
What You'll Need
- Soda can
- 2 plastic spoons
- Drinking straws
- Wire
- Wire cutters
- Pliers
- Drill with a drill bit
- Glue gun
- File
- Knife
How to Make a Soda Can DIY Watering Can
There are a few more instructions, so follow this link here if you need all of the details. You'll need to cut the top of the can off within the mouth edge to avoid any sharp edges. Use your pliers to cut any sharp points that may stick out.
You will cut another hole at the bottom of the can and attach your straw using a glue gun. Using the head of both spoons, create small holes and attach them to the end of the straw to make the spout of your watering can.
Use the wire to create the handle around the back end of the can - opposite of the spout. And there you have it. The traditional watering can you've been looking for. You can even spray paint the entire thing in a metallic coating for the optimal look.
Decorative Watering Can with Fairy Lights
A watering can doesn't necessarily have to be fully functional. They also make for great home decor pieces as well. Take, for example, this beautiful DIY watering can with fairy lights pouring out of the spout. It's like something you see in the ads, except you've made it yourself! Here's how.
What You'll Need
- Watering can
- Fairy lights
- Screwdriver
- Pliers
- Plant hanger
How to Make a Decorative DIY Watering Can with Fairy Lights
Remove the end of the watering spout of your watering can and place the battery pack for your fairy lights inside the main basin. Carefully string the fairy lights through the end of the spout.
Going back to the end of the watering spout, you'll need to use a screwdriver or drill to make larger holes that the fairy lights will be able to fit through. Use your pliers to bend or cut any sharp metal edges from this process.
String your lights through the new holes you have created and reassemble your watering can. Hang your watering can from a plant hanger, which will allow the lights to pour over your plants.
Where to Buy a Watering Can

Don't worry. If you decide a DIY watering can isn't for you, we've got you covered. We want to make sure that you know where to shop for a watering can to keep your garden looking alive and well.
A watering can may come in all shapes and sizes, made from varying materials. Finding exactly what you are looking for isn't always the simplest task when you start shopping around. Here are a few ideas on where to buy a watering can to help you maintain the garden of your dreams.
Swap Meets
Check out your local swap meets to see what type of crafty watering cans you can find, if any. Since you're not guaranteed to find what you are looking for when shopping at swap meets, it's worth going into this shopping experience with an open mind. After all, you might be able to pick up some exciting materials to craft a watering can of your own from something you find here.
Facebook Marketplace
But, if you prefer looking for something that's already made for you, you can also look at Facebook Marketplace. This online marketplace is a great way to see if anyone in your area is trying to get rid of an old watering can. You can even search through the free section. Since a watering can is relatively inexpensive, people might be willing to part with them at no cost to you. Sometimes, it's just a matter of having patience.
Happy Gardens Store
For those gardeners who aren't willing to compromise on quality or craftsmanship, shopping for a watering can at the Happy Gardens Store is highly recommended. Here you can search through our watering can collection to find something that matches your garden's aesthetic, like this Antique Green Watering Can.
Throughout our store, you'll find items that have been designed by artists and hand-selected by the Happy Gardens team. Since making your backyard dreams come true is what we live for, we're always happy to help spark some creativity and inspiration.
About Happy Gardens
If you're looking for thoughtful and unique garden pieces and merchandise, great for all outdoor spaces, you'll want to take a look at the Happy Gardens online collection. You'll quickly see that Happy Gardens is the best place to shop, whether you've been endlessly searching for that perfect watering can, charming hummingbird feeder, or beautifully crafted rain chain. With none other than your happiness in mind, each product you'll come across on our site has been handcrafted with love.
Our beloved products come from a wide variety of special collections, all of which are top-rated. While you take the time to find your favorites, keep an eye out for some of ours. We absolutely adore our eye-catching spinners, artistic birdhouses, unique garden ornaments and statues, and so much more.
But, that's not all. We've also got a brand new line of merchandise, with fun and exciting gifts readily available year-round for the fellow garden enthusiasts in your life. Perfect for any occasion, here you'll find the cutest tote bags, coffee mugs, and wine glasses for your loved ones.
Join our mailing list by simply entering your name & email address to stay up to date on the latest and greatest happenings at Happy Gardens. You can look forward to limitless fun along with gardening tips and tricks flooding your newsfeed right away. For even more inspiration, follow us on Instagram and Facebook!
So, how do you pick the perfect watering can for your garden? Try asking one of us via chat. After all, here at Happy Gardens, we're happy to help!


